User Maintenance App.
Great things can be achieved with the right tools.
Simplicity's suite of utilities and processes that provide the mechanisms for moving, consolidating and distributing data to meet your businesses automation and workflow requirements.
This section will provide you with a brief understanding and knowledge of these components and a quick reference to aid you in your Simplicity development.
Overview.
The user maintenance application provides means of granting / modifying users security access rights in the capacity of adding, updating or removing permission to the entire system or portion thereof.
You will also note when using it that is an implementation of the Simplicity desktop application itself making it both the chicken and the egg. (Using the Simplicity app to grant permission to use the Simplicity app)
The user maintenance app allows you to grant a user permission to a particular implementation and also which environments (Development, Test or Production) that they have access to. You also stipulate the security profile they have been associated with. Their selected profile may consist or one, many or no function and security groups. It is via these groups that business and access rules may provide different interfaces, accessibility or workflow.
The Simplicity desktop application access permission sits on top of your network environment's security.
User Maintenance - Common Tasks.
Great things can be achieved with the right tools.
Simplicity's suite of utilities and processes that provide the mechanisms for moving, consolidating and distributing data to meet your businesses automation and workflow requirements.
This section will provide you with a brief understanding and knowledge of these components and a quick reference to aid you in your Simplicity development.
User Maintenance Walk Through - Creating a New User.
Steps 1 - 22
The following walk through takes you through the process of creating a new user and granting them access to use the Simplicity desktop application.
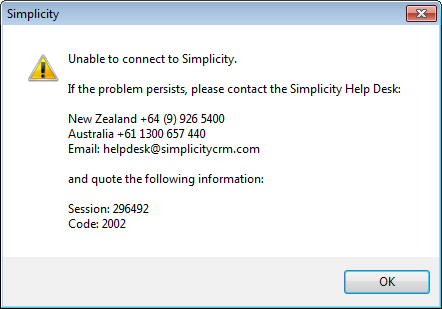
STEP 1.
When a user that has not been setup in Simplicity runs the Simplicity desktop application they will be presented with the following prompt. What will vary on these messages are the session number and the associated code. They will then be prompted to phone the help desk for support.
STEP 2.
To grant the user access now, run the Simplicity User Maintenance application.
Once this has been done you should see a toolbar as below.
Click on the Security Log icon to look up the session code that has been provided.

STEP 3.
You will be presented with the Security Log search screen.
Click on the preview below to view the full image.

STEP 4.
Enter in the session code that has been provided to you and click Find.
Click on the preview below to view the full image.

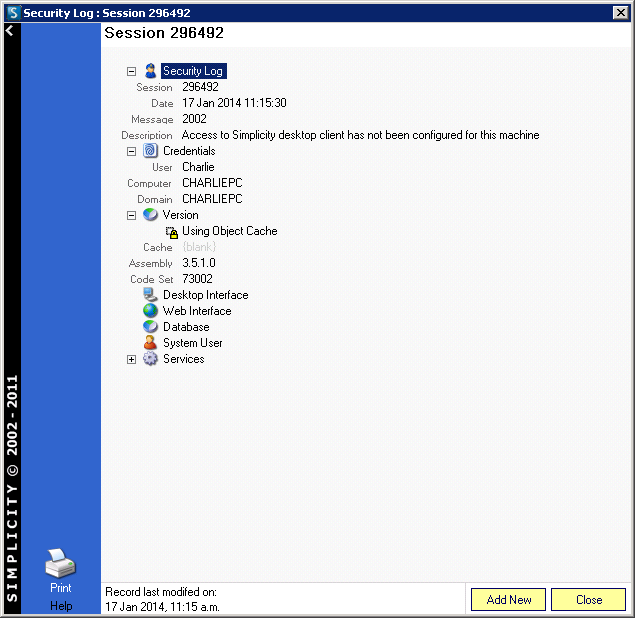
STEP 5.
You will be see the entry relating to the session code you provided.
Click on the preview below to view the full image.

STEP 6.
Session code details displaying who and from where has attempted to access the Simplicity desktop application.
STEP 7.
If you are setting up a new database for the first time you will to complete the steps 7 - 10, otherwise skip to step 11.
Click on databases.

STEP 8.
Select add new database.
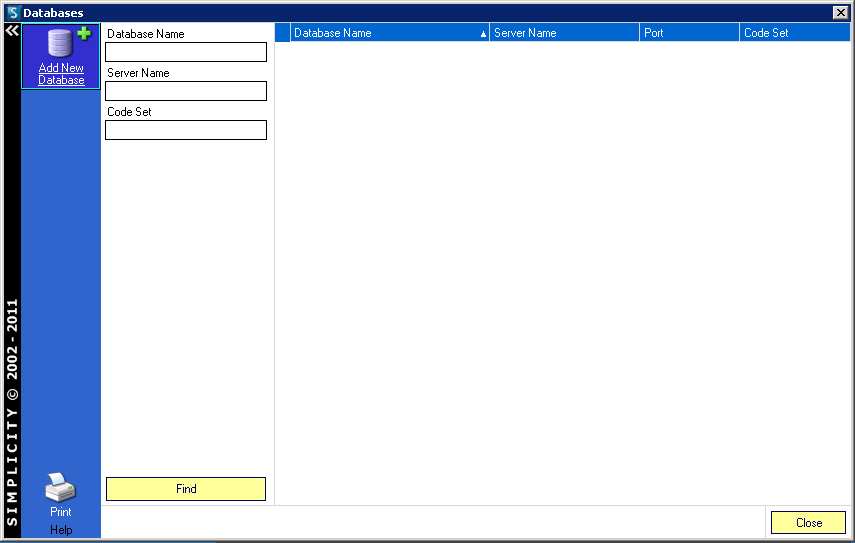
STEP 9.
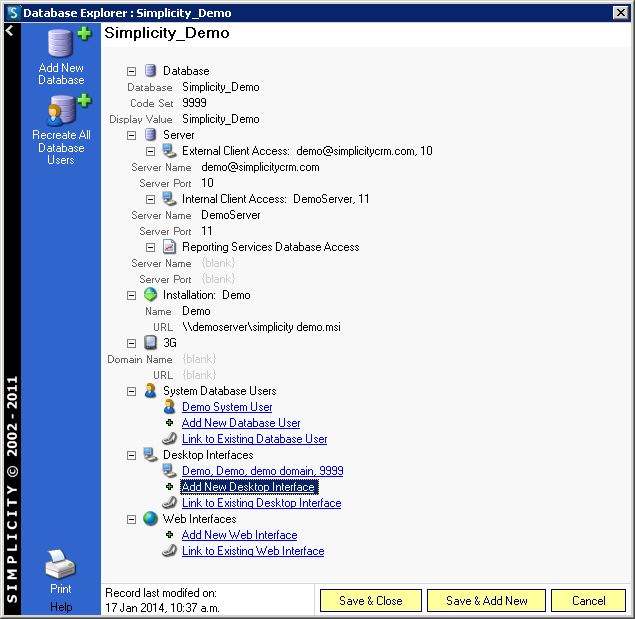
New Database Explorer.
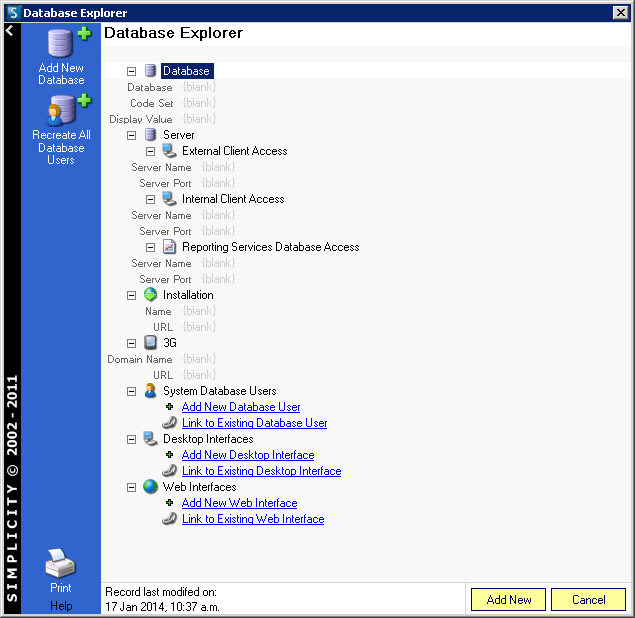
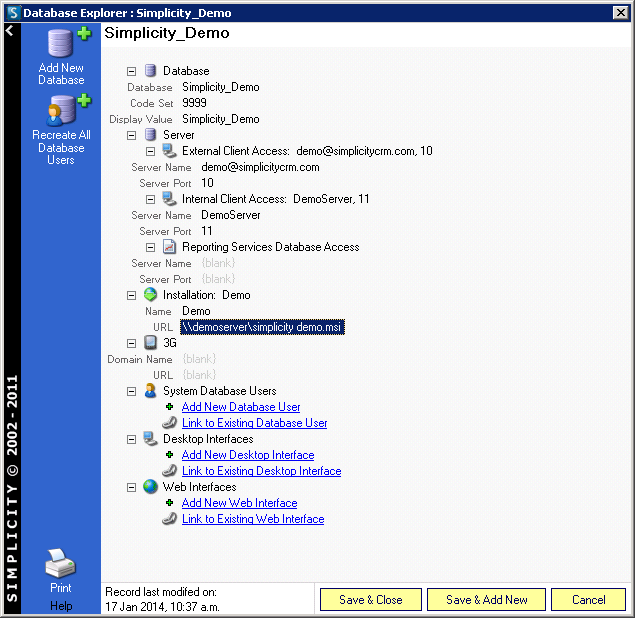
STEP 10.
Enter in the Simplicity Client database attributes as illustrated below.
STEP 11.
From the database explorer click on add new desktop interface.
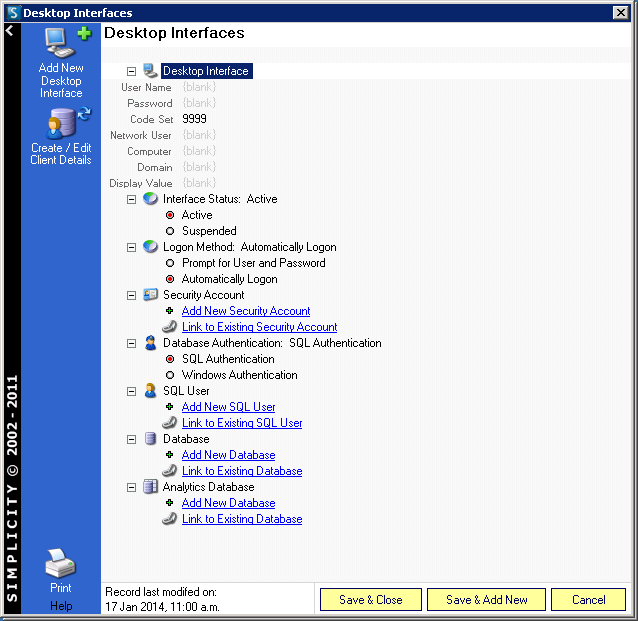
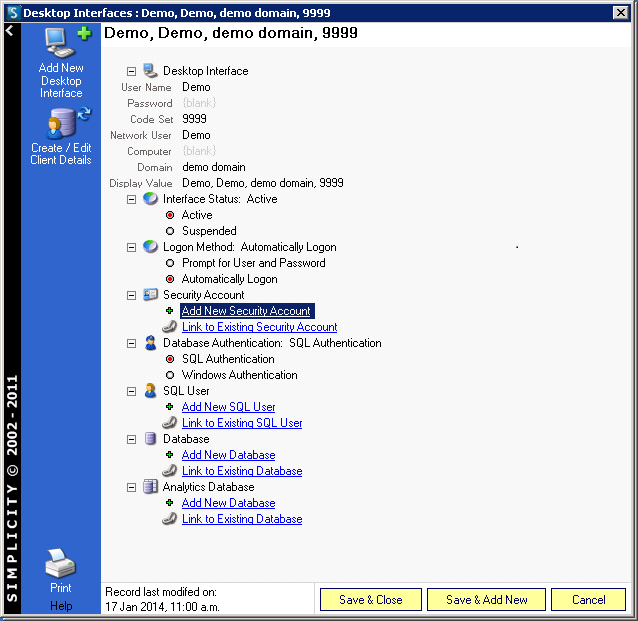
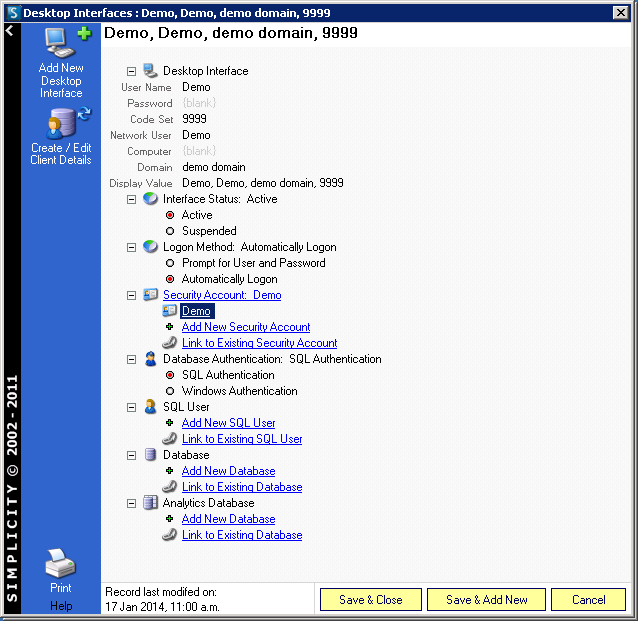
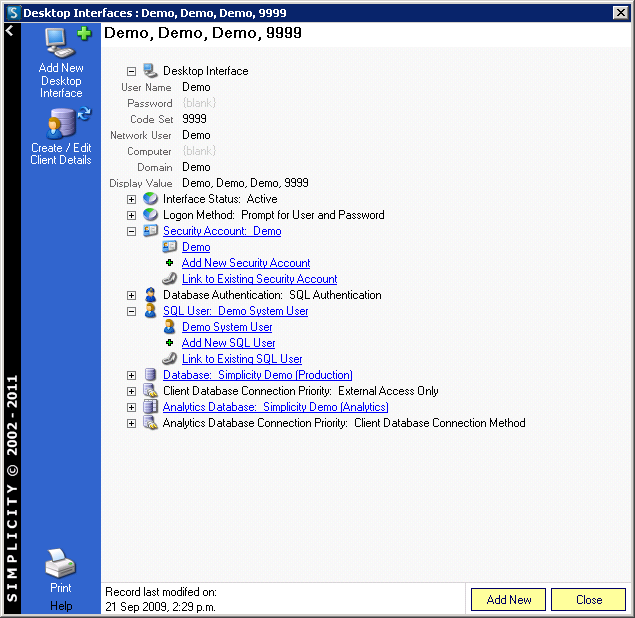
STEP 12.
Enter in the desktop interface details and then click add new security account.
STEP 13.
Enter in the security account details and click save.
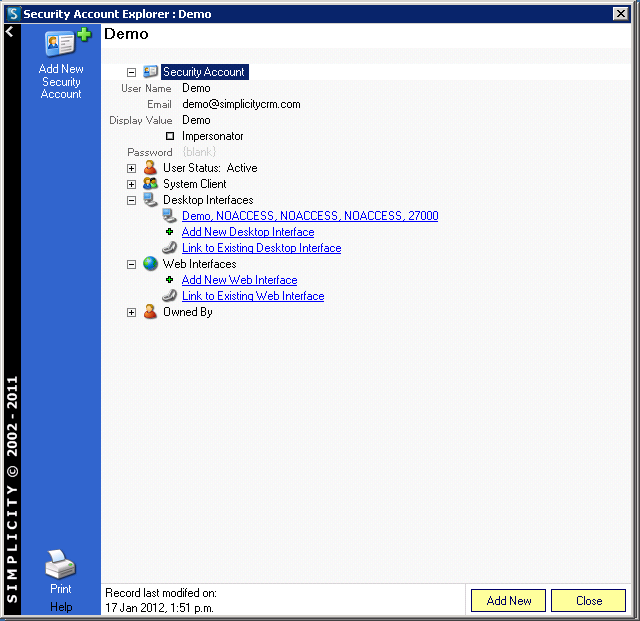
STEP 14.
This will return you to the desktop interface explorer.
STEP 15.
Now click on add new sql user.
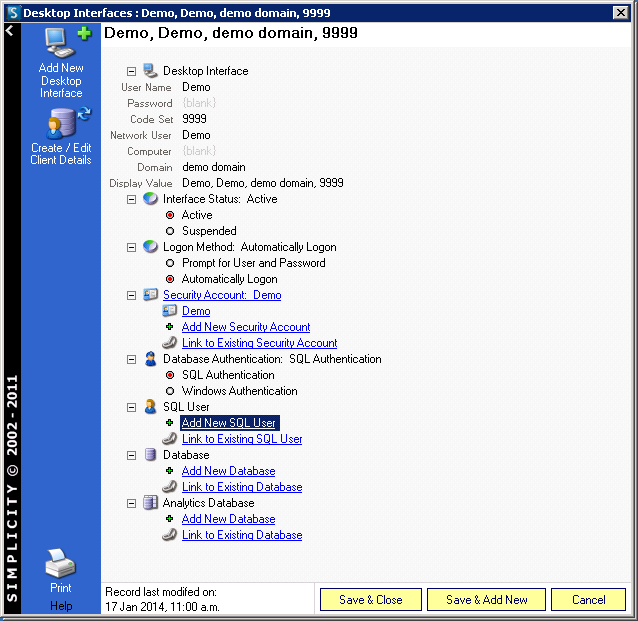
STEP 16.
Enter in the sql user details.
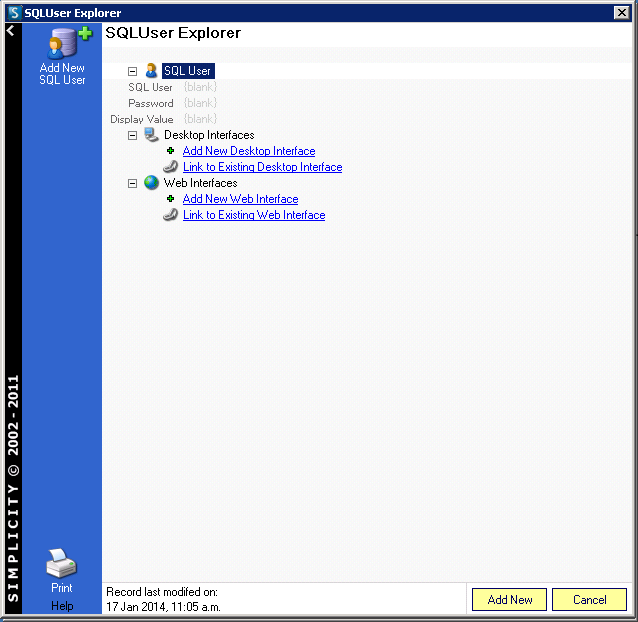
STEP 17.
To use your Active Directory / NTLM Authentication leave the password field blank.
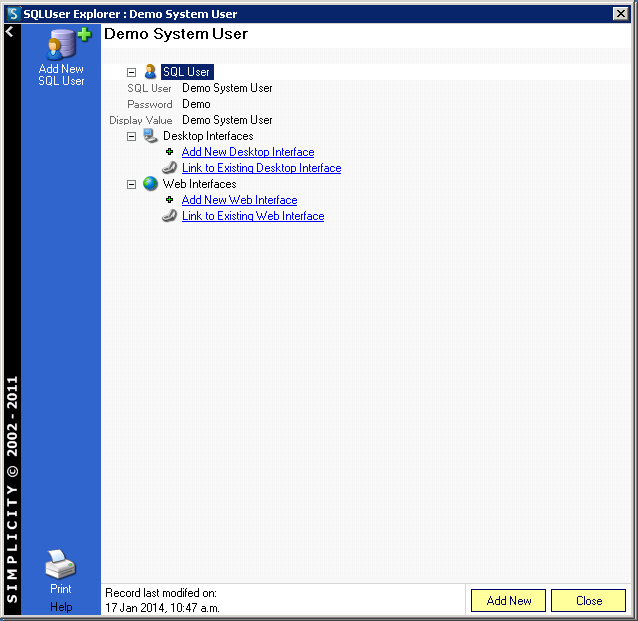
STEP 18.
After clicking save you will be returned again to the desktop interface explorer.

STEP 19.
You can return to the database explorer and add any additional desktop interfaces as required.
STEP 20.
For each user once you have completed entering in their details and all the other associated entities you should open the desktop interface explorer on their record.
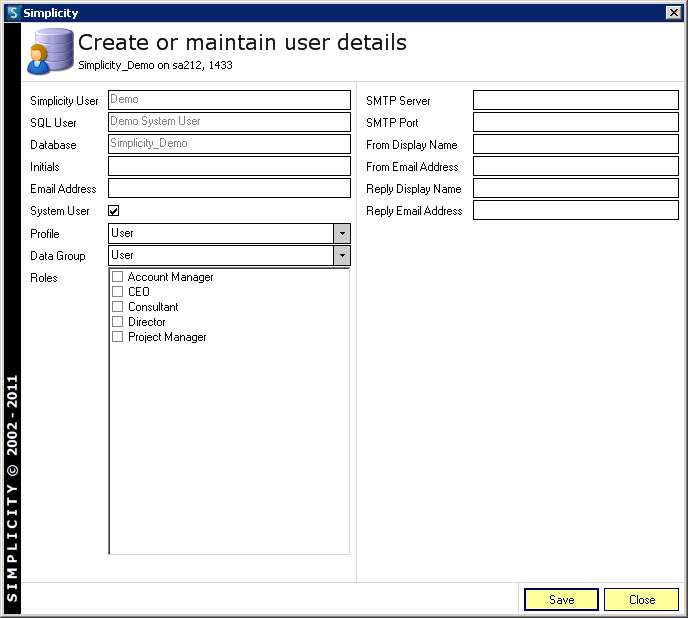
STEP 21.
Click create / edit client details to publish the configured user into the database.
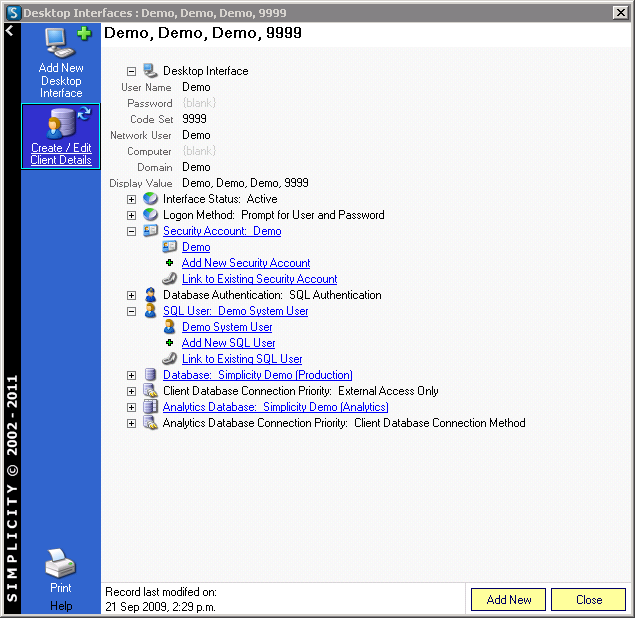
STEP 22.
Select the user's profile, data group and roles. Once you have done this click save and your database user setup will be complete.