Simplicity Campaign Automation.
Great things can be achieved with the right tools.
Simplicity's suite of utilities and processes that provide the mechanisms for moving, consolidating and distributing data to meet your businesses automation and workflow requirements.
This section will provide you with a brief understanding and knowledge of these components and a quick reference to aid you in your Simplicity development.
Overview.
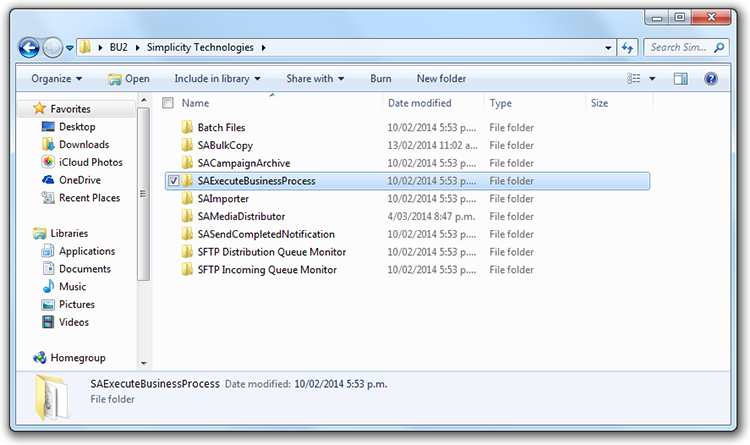
This is the application that is used for the automated execution of Simpliicty campaigns.
Simplicity Automated Campaigns - Common Tasks.
Great things can be achieved with the right tools.
Simplicity's suite of utilities and processes that provide the mechanisms for moving, consolidating and distributing data to meet your businesses automation and workflow requirements.
This section will provide you with a brief understanding and knowledge of these components and a quick reference to aid you in your Simplicity development.
Automated Campaign Scheduling Walk Through - Creating a New Job.
Steps 1 - 38
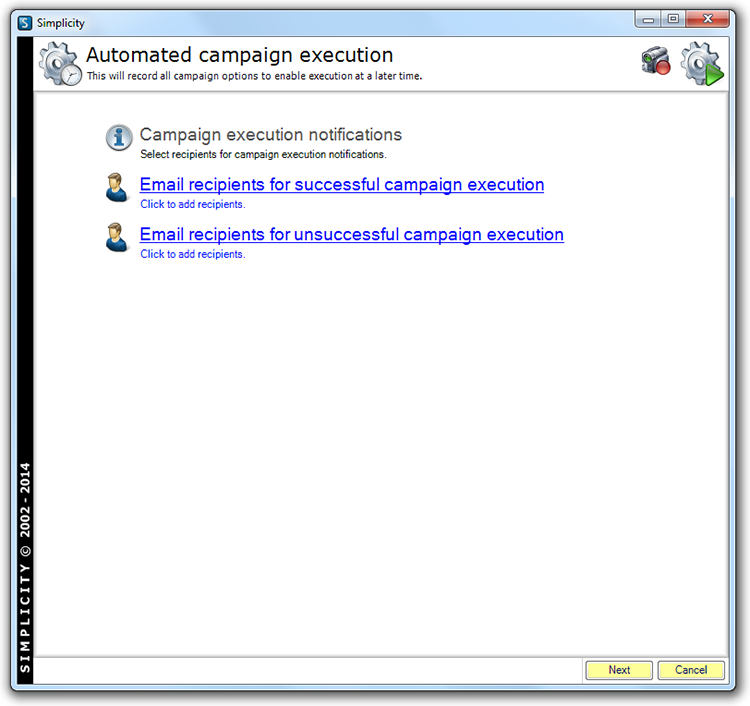
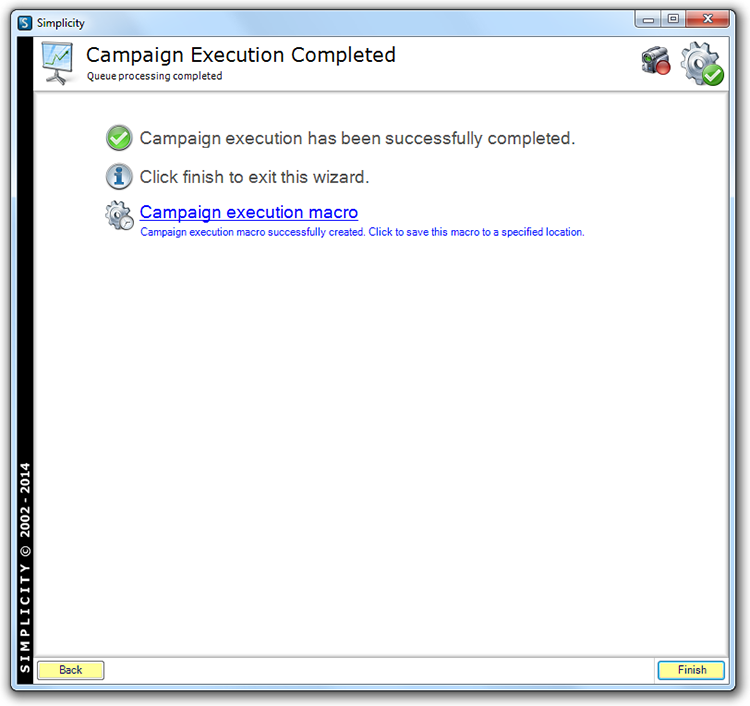
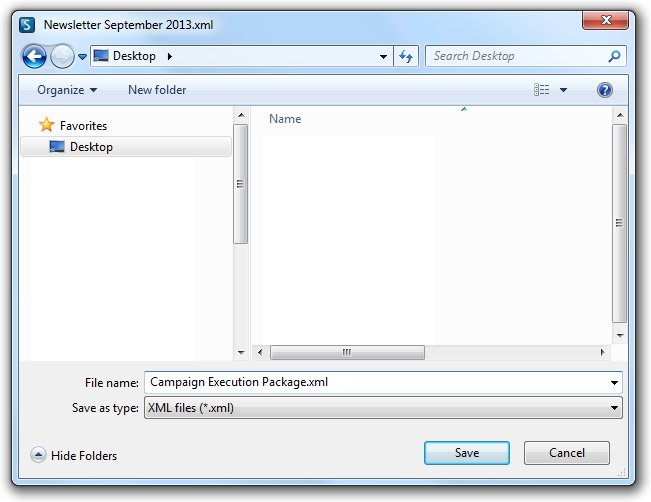
The following walk through takes you through the process of creating a new scheduled campaign execution job. The execute business rule processor will automatically execute your campaign execution plans. These plans include all of the execution choices you make during the campaign automation process.
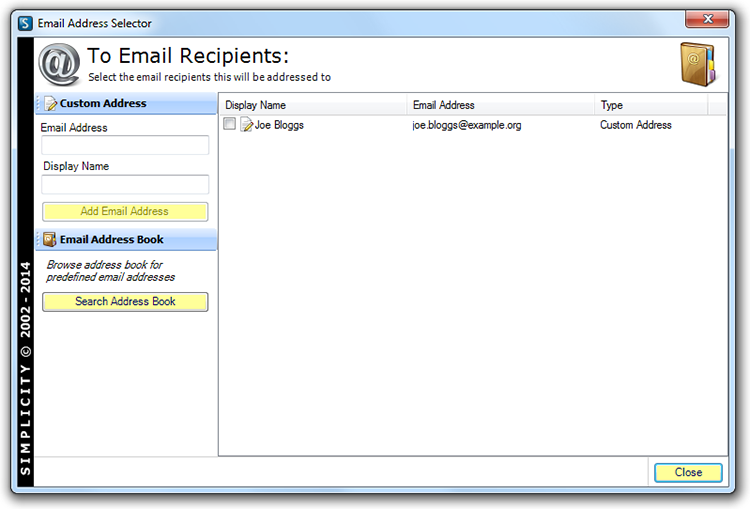
STEP 1.
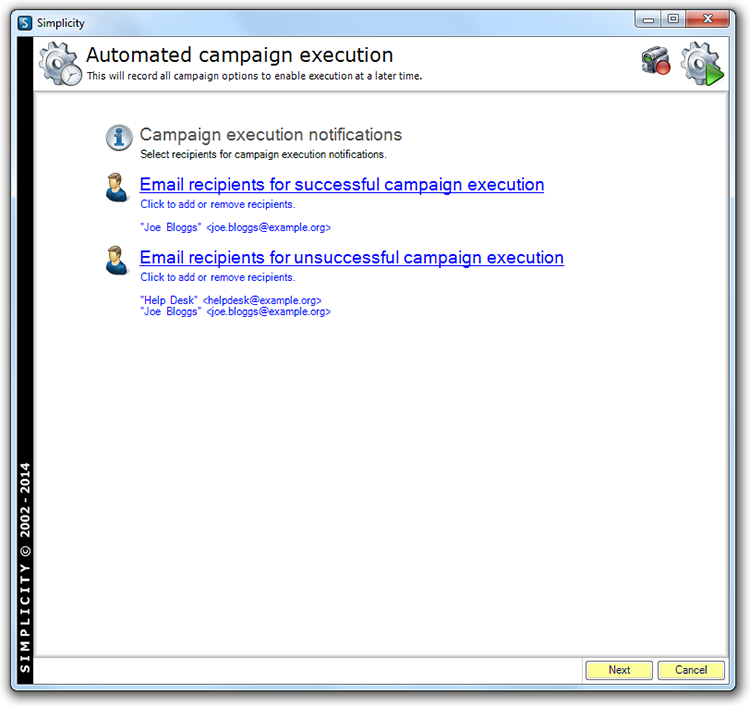
Click on the preview below to view the full image.
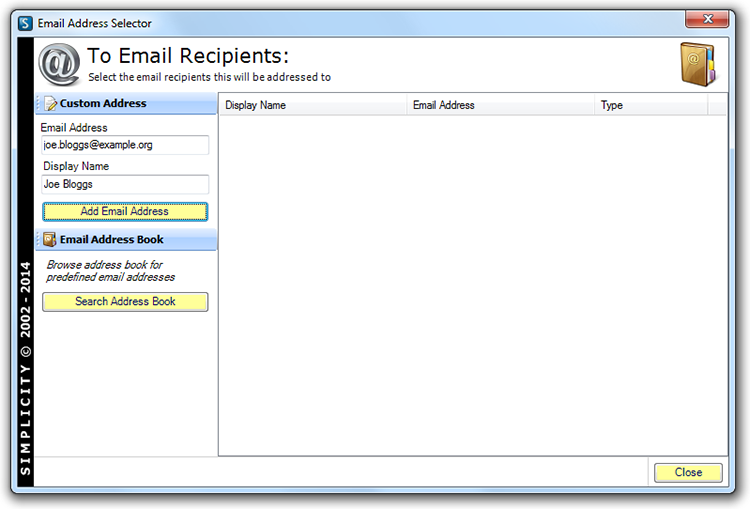
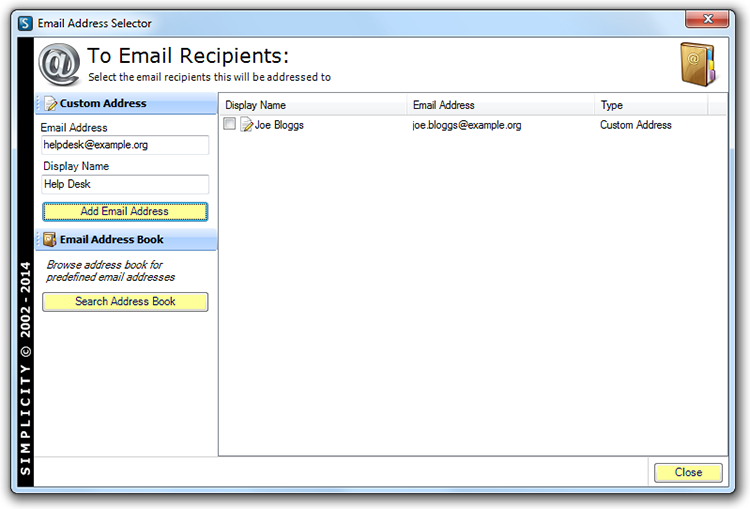
STEP 2.
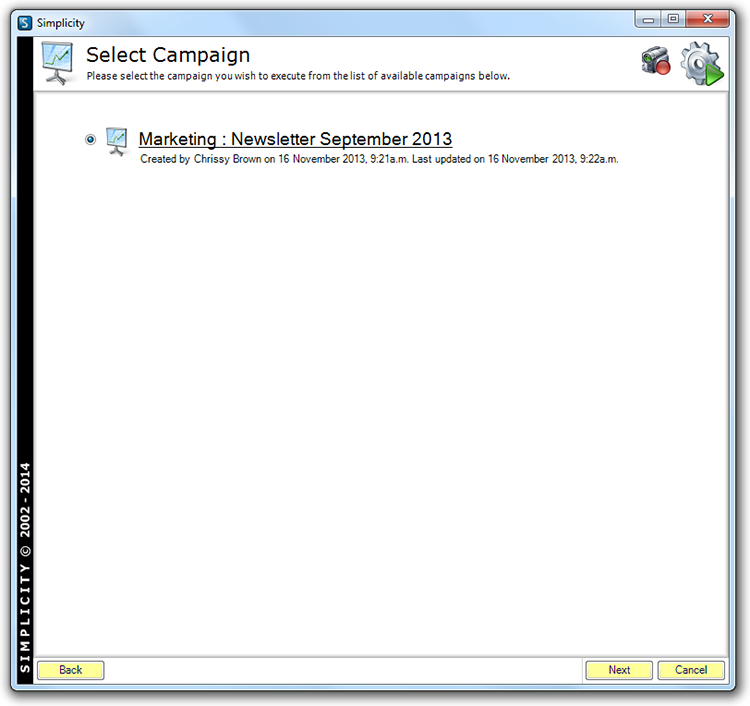
Click on the preview below to view the full image.
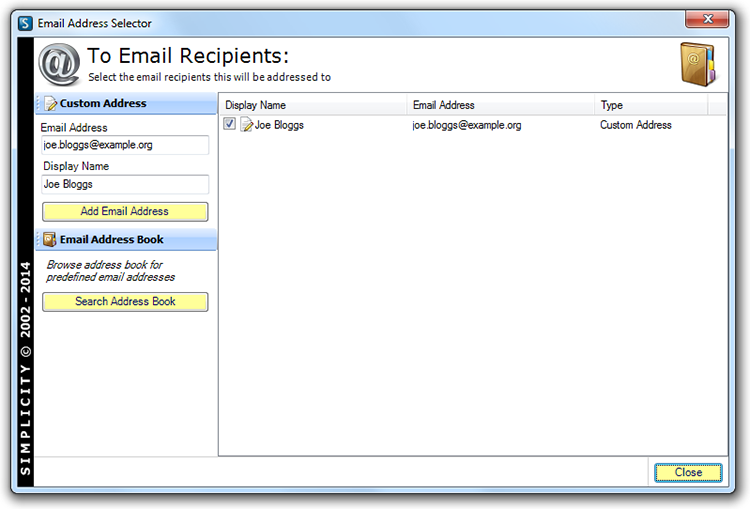
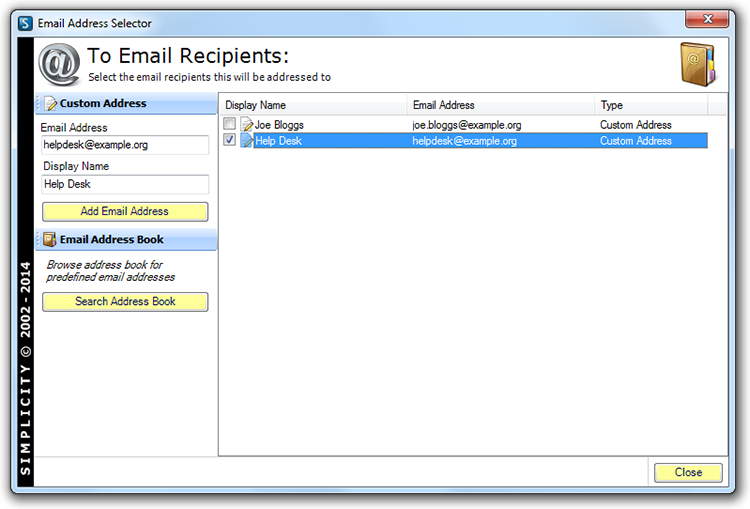
STEP 3.
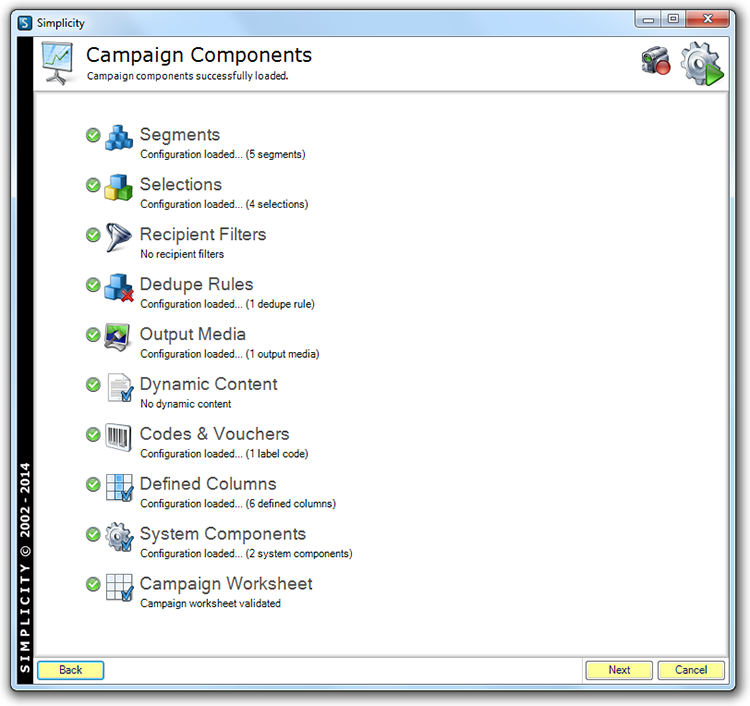
Click on the preview below to view the full image.
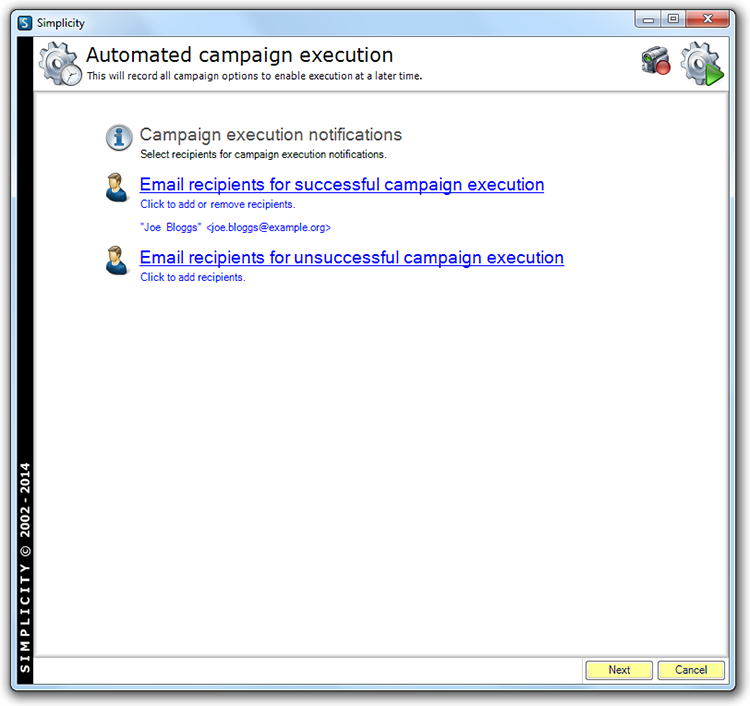
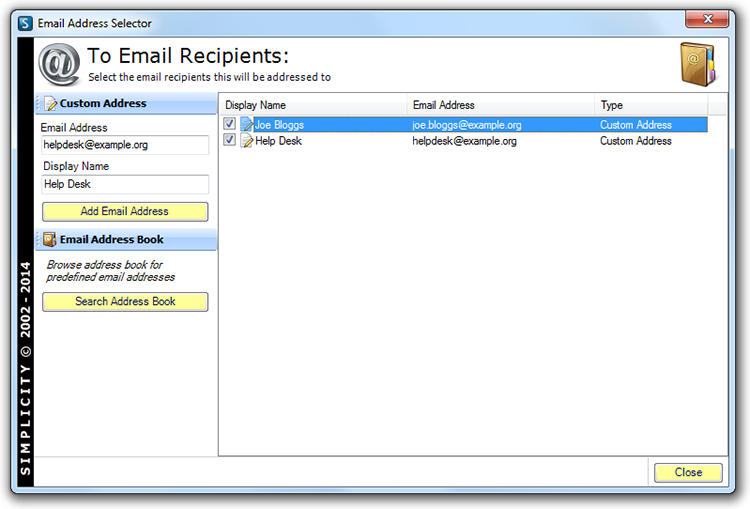
STEP 4.
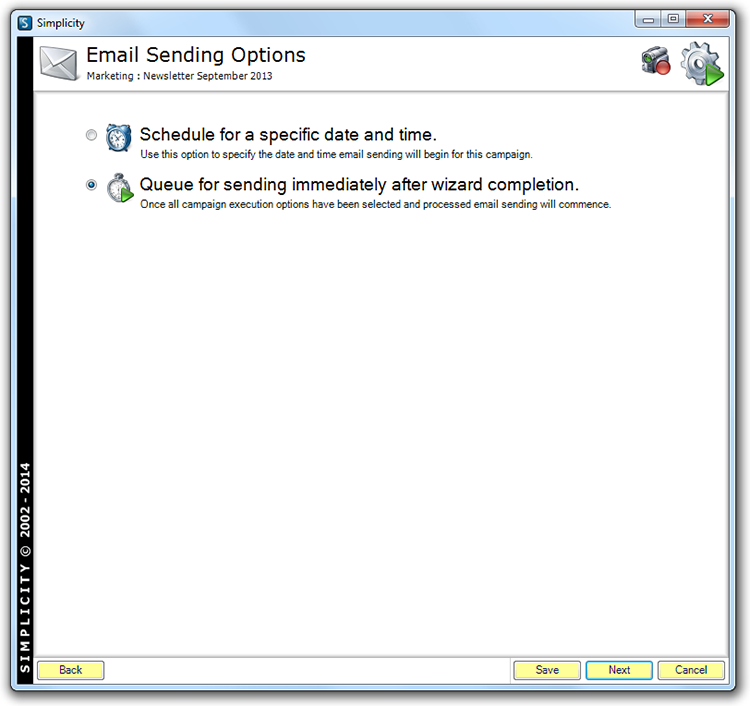
Click on the preview below to view the full image.
STEP 5.
Click on the preview below to view the full image.
STEP 6.
Click on the preview below to view the full image.
STEP 7.
Click on the preview below to view the full image.
STEP 8.
Click on the preview below to view the full image.
STEP 9.
Click on the preview below to view the full image.
STEP 10.
Click on the preview below to view the full image.
STEP 11.
Click on the preview below to view the full image.
STEP 12.
Click on the preview below to view the full image.
STEP 13.
Click on the preview below to view the full image.
STEP 14.
Click on the preview below to view the full image.
STEP 15.
Click on the preview below to view the full image.
STEP 16.
Click on the preview below to view the full image.
STEP 17.
Click on the preview below to view the full image.
STEP 18.
Click on the preview below to view the full image.
STEP 19.
Click on the preview below to view the full image.
STEP 20.
Click on the preview below to view the full image.
STEP 21.
Click on the preview below to view the full image.
STEP 22.
Click on the preview below to view the full image.
STEP 23.
Click on the preview below to view the full image.

STEP 24.
Click on the preview below to view the full image.
STEP 25.
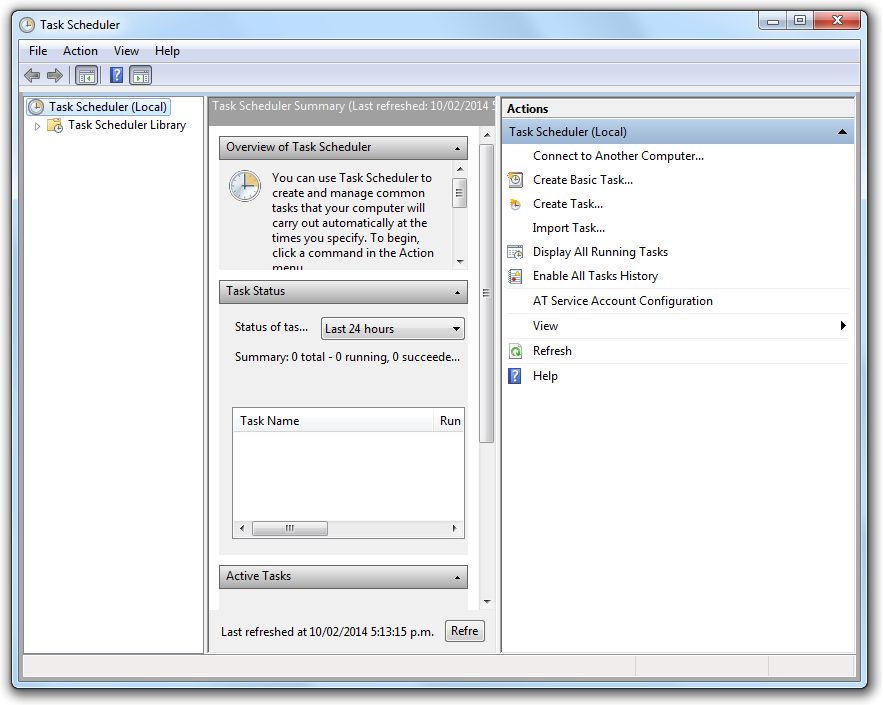
Now open "Task Scheduler" to schedule your command file that you created in the earlier steps.
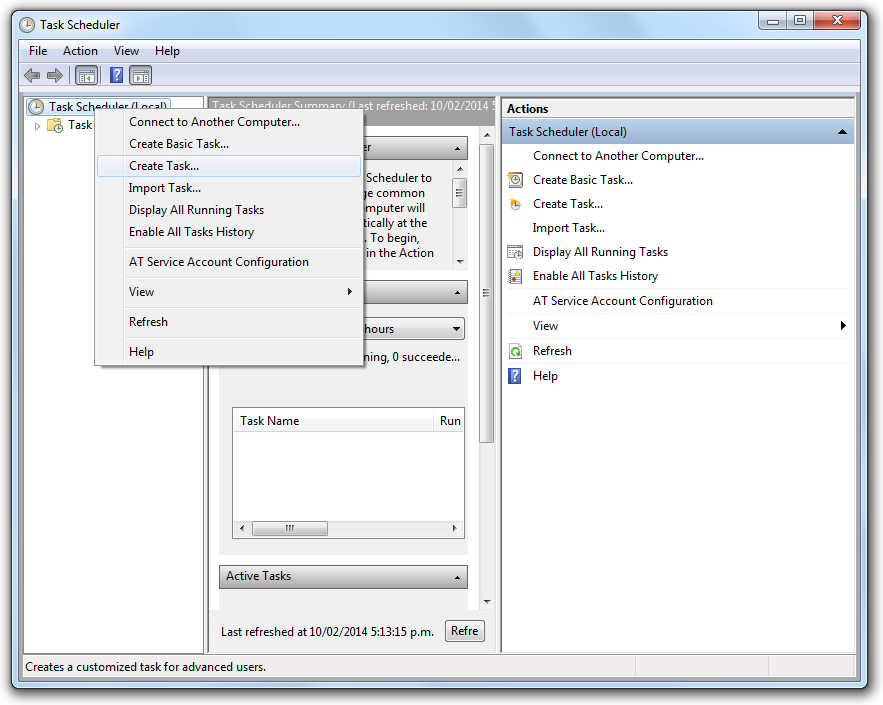
STEP 26.
Right click and select "Create Task".
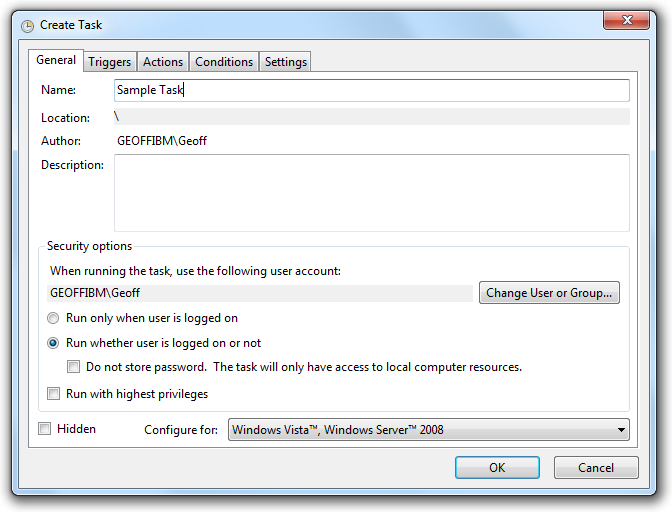
STEP 27.
Give your new task a name.
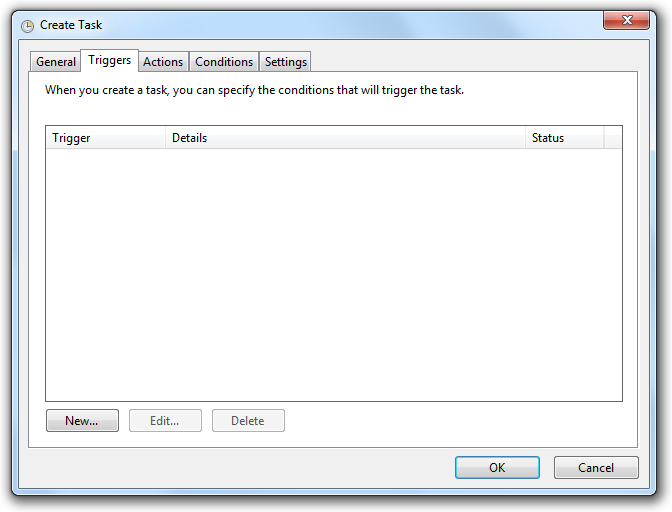
STEP 28.
Move to the triggers tab and click "New".
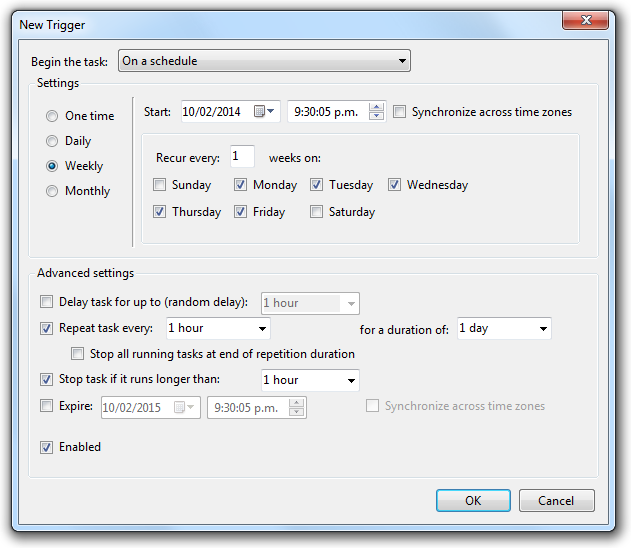
STEP 29.
Specify the schedule you require and click "OK".
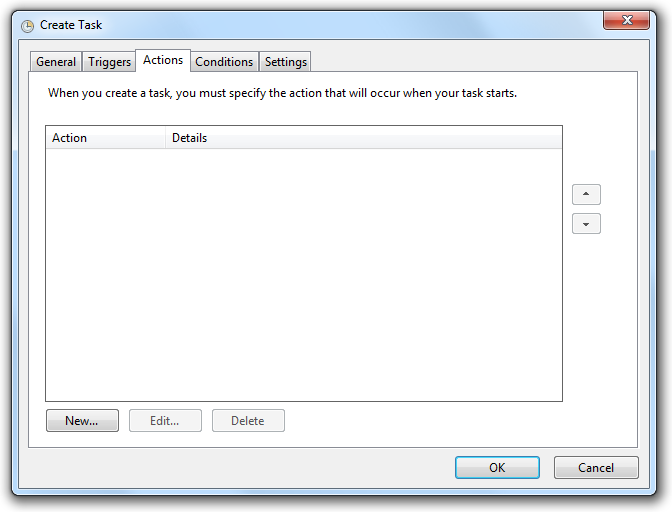
STEP 30.
Select the "Actions" tab and click "New".
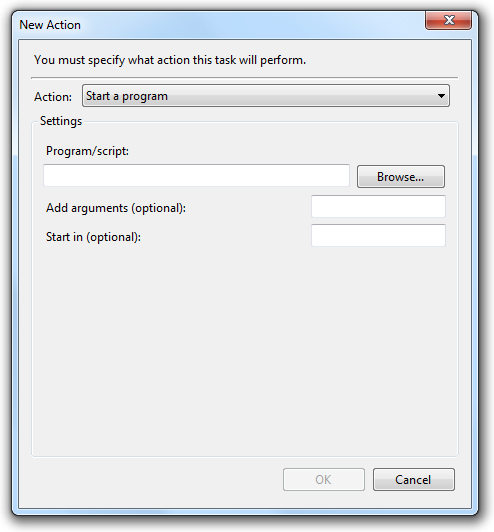
STEP 31.
Click "Browse" to select your command file.
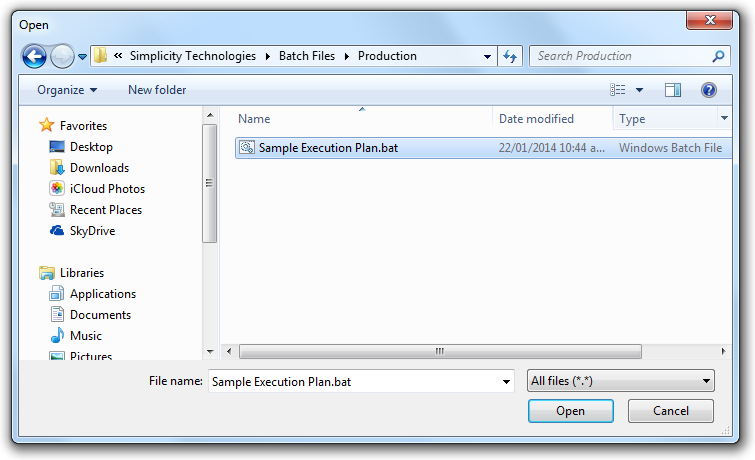
STEP 32.
Browse to the appropriate folder and click "Open".
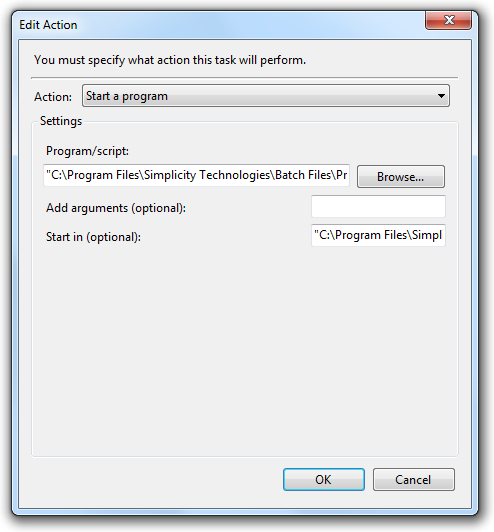
STEP 33.
Make sure the program and start in locations are specified and click "OK" when configured..
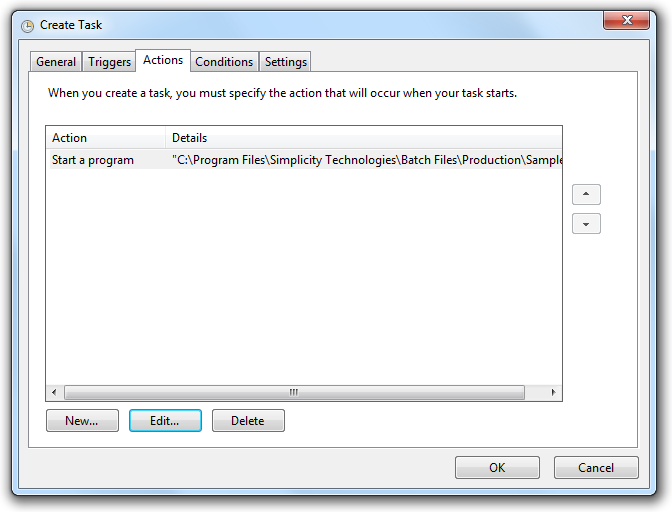
STEP 34.
Your action should appear in the actions list.
STEP 35.
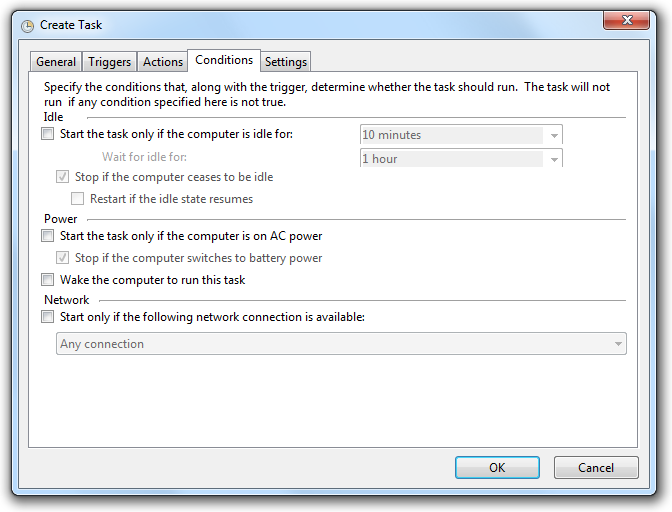
Check your settings under conditions are appropriate for your scheduled task.
STEP 36.
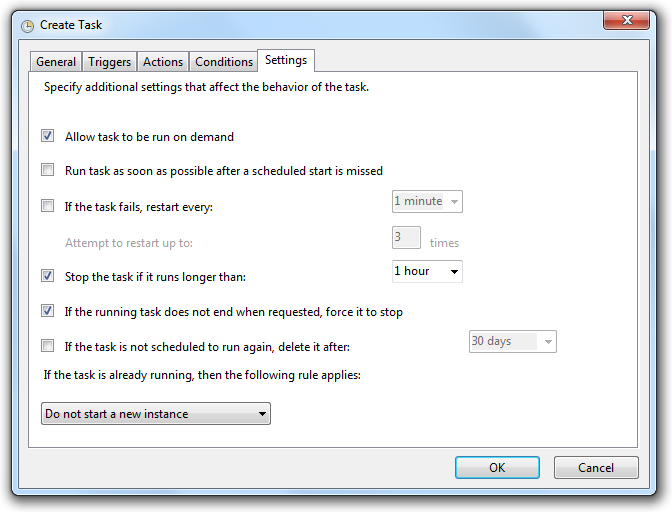
The settings tab allows you specify more options. An important consideration is what this should do if it is run when this task is already running. This should typically set to "Do not start a new instance". Running concurrent import processes may have adverse affects.
STEP 37.
When you click "OK" you will be prompted for the security credentials to commit your changes.
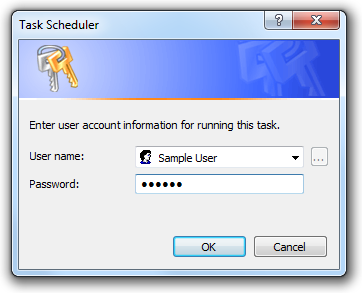
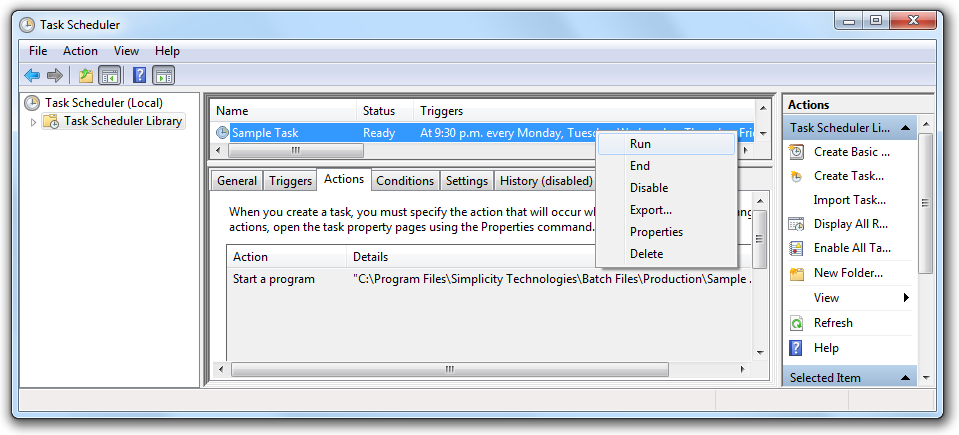
STEP 38.
The task should now appear ready to run at it's scheduled time. Right clicking on tasks here allow you to perform common operations on the tasks like manually starting or stopping the scheduled task.