Email Campaigns Workspace
There are several options on setting up and executing an email campaign in the Studio. These options range from 'just add text and send' to 'build your own' using all the Studio functionality. Your account manager will discuss the best option(s) for your business needs. Basic templates are provided with the initial setup of the Desktop Application.
All campaign options include personalisation, unsubscribe functionality, dedupe rules, view online and share (if required) versions of the email.
Options:
- Campaign Portal — all campaign components are pre-defined with a fixed email layout. Only the email content can be modified.
- Campaign Template — all campaign components are pre-defined. An email template can be included and, if required, the email layout can be modified by the Studio user. New html files can also be replaced in the campaign.
- Full Studio — build the campaign by dragging and dropping the individual components from the Toolbox into the Canvas; or by using the Full Campaign Studio Interface.
Campaign Portal
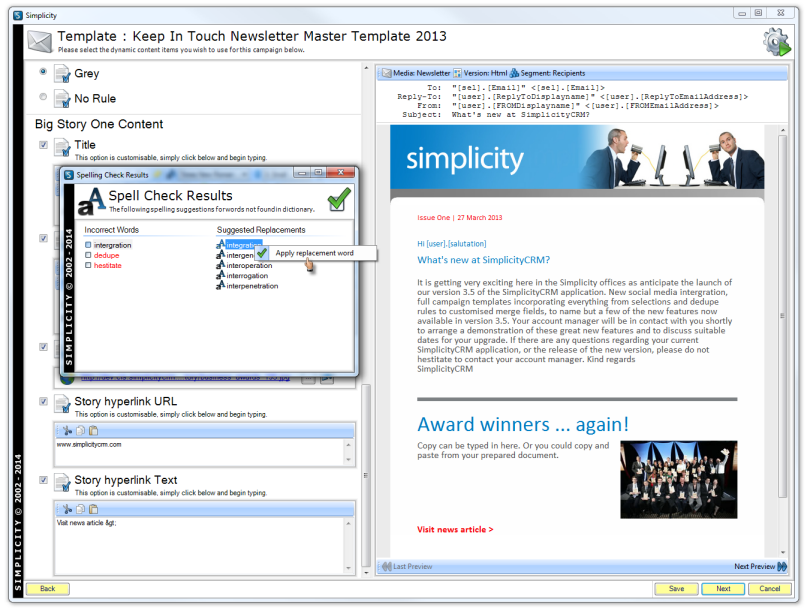
Content is added to the Campaign Portal template using the Campaign Wizard.
Spell check and profanity checking are part of the standard Campaign Portal functionality.
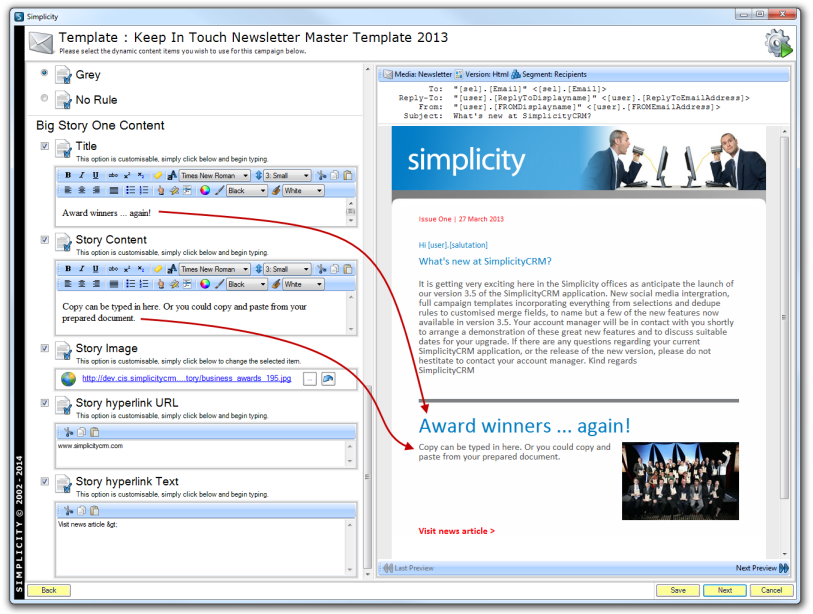
Campaign Template
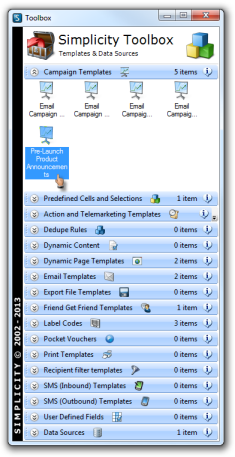
Campaign templates are set up in the toolbox with pre-defined assets. The templates can be used as is, or used as the starting components of a campaign.
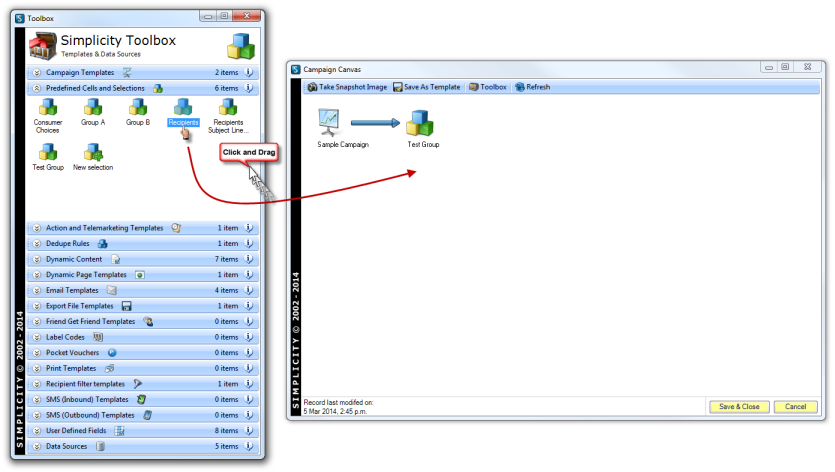
Simplicity Toolbox — Campaign Template
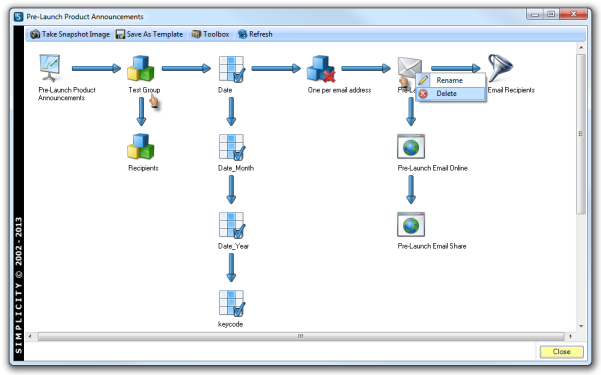
Clicking on a campaign template will open the Campaign Canvas.
Clicking on any of the icons in the canvas will open the individual assets to enable editing of each asset. Right clicking on any of the icons will give you the option of deleting or re-naming each asset. Also see Full Campaign Studio for examples of campaign assets.
Full Campaign Studio
Campaign Canvas
A new email campaign can be created from the ground up by dragging templated assets from the Toolbox into the Campaign Canvas.
Open a blank canvas by clicking on the Add New Campaign icon in the Campaign List.
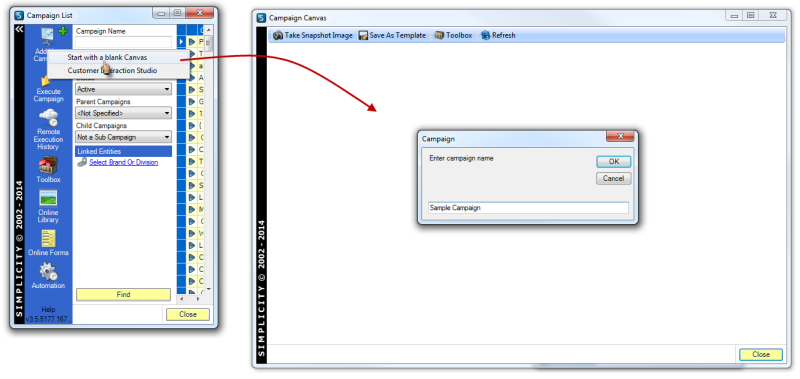
Open the Toolbox and drag the required assets into the Campaign Canvas.
Full Campaign Studio Interface
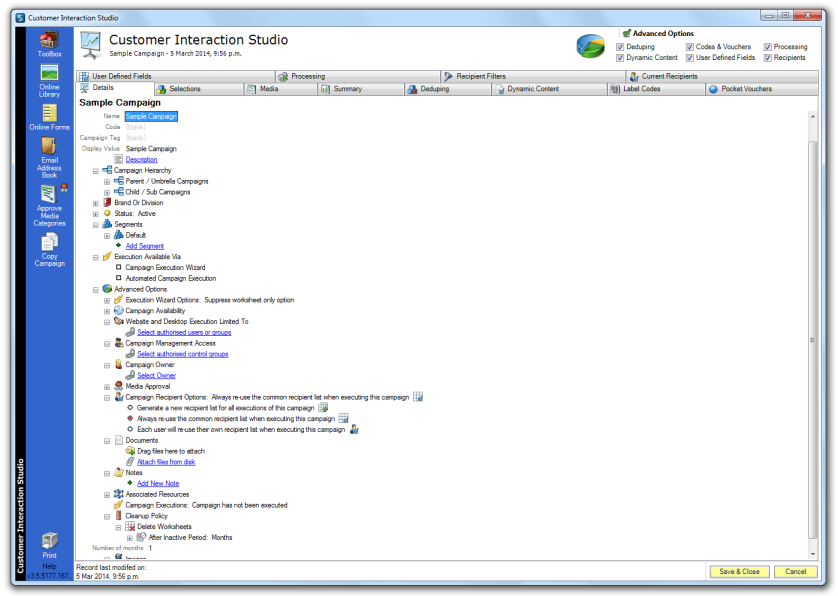
Create a campaign using the full Studio interface.
Details Tab
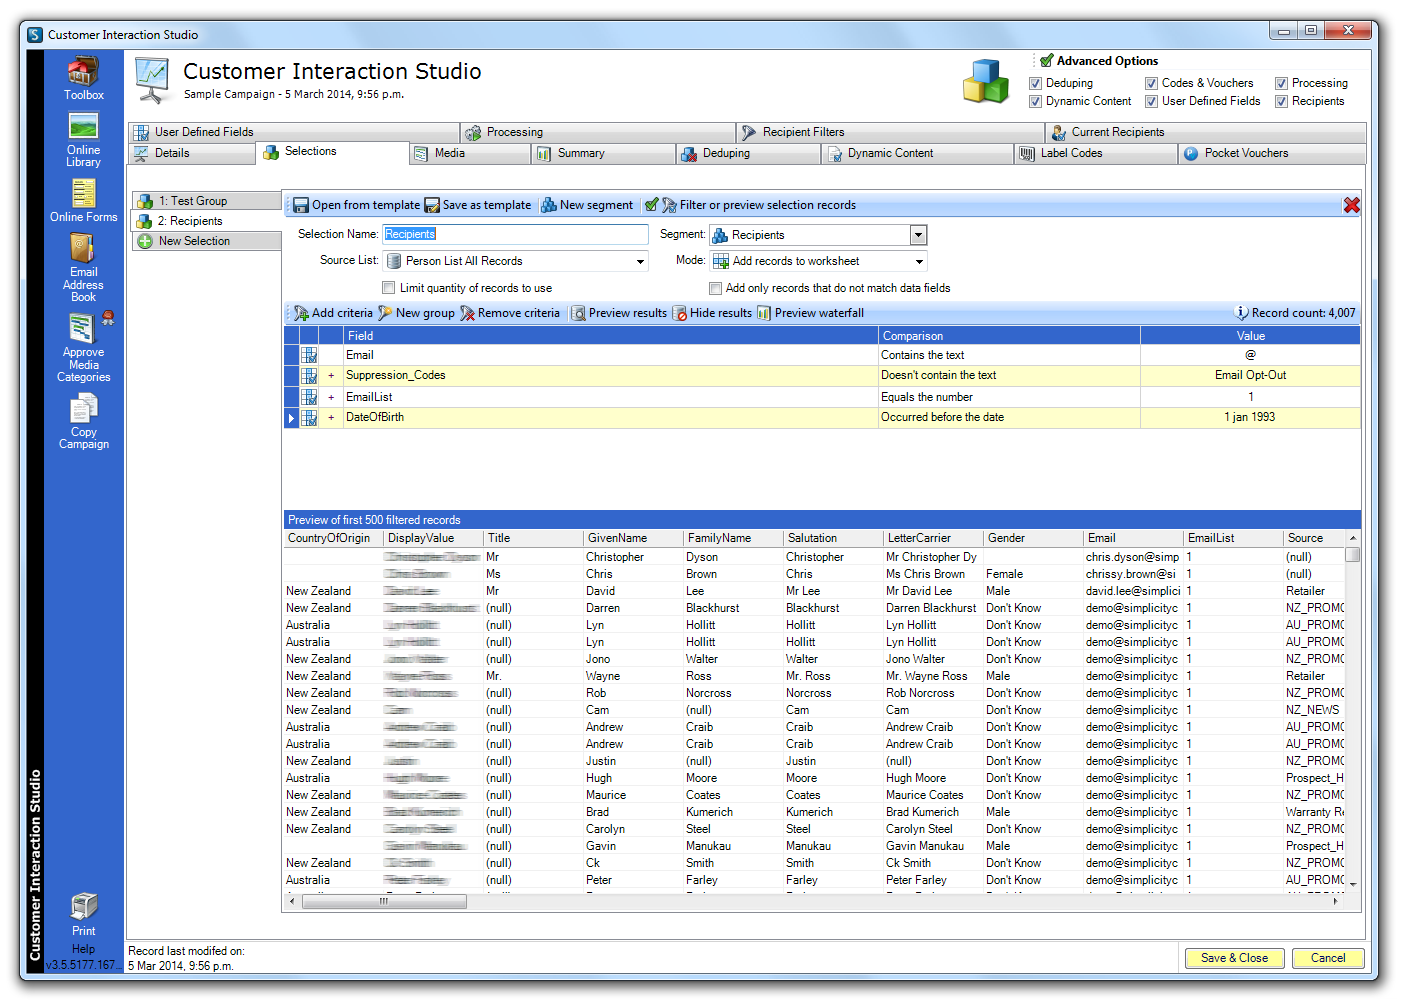
Selections Tab
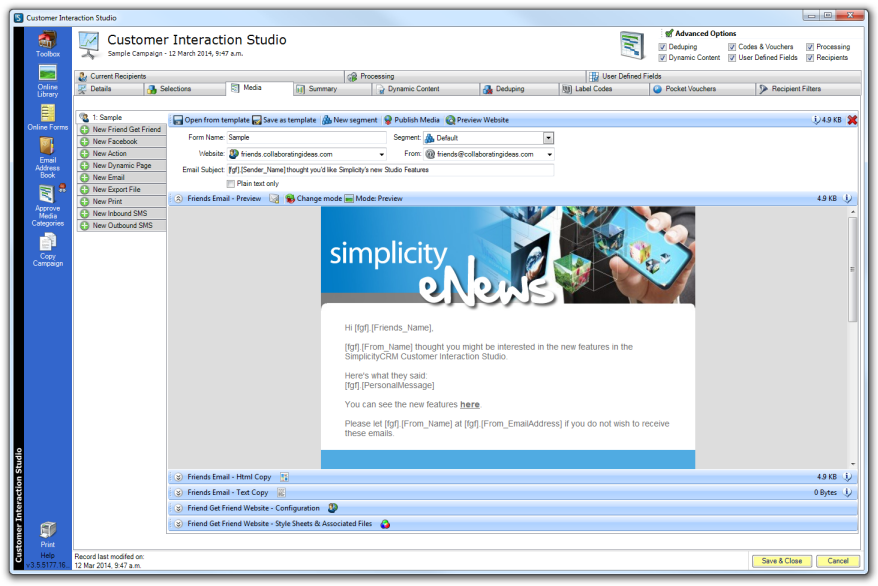
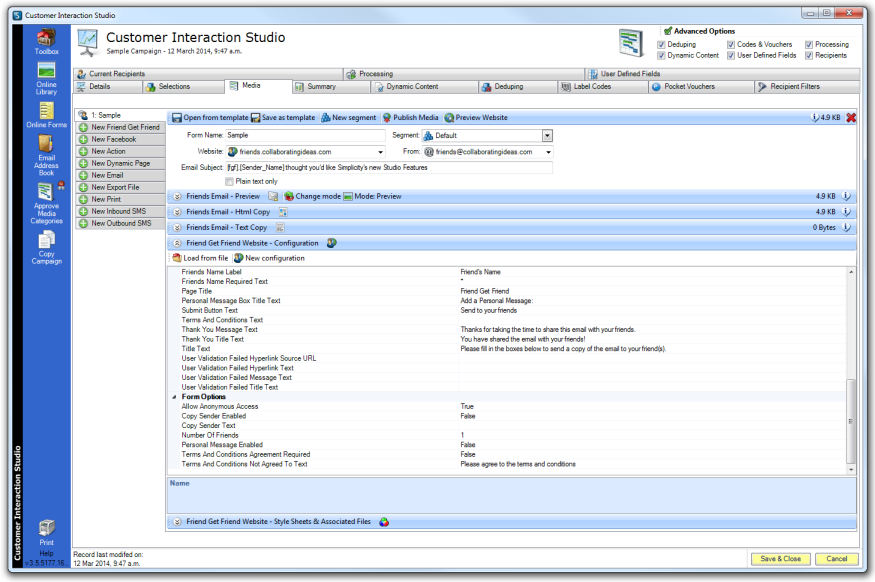
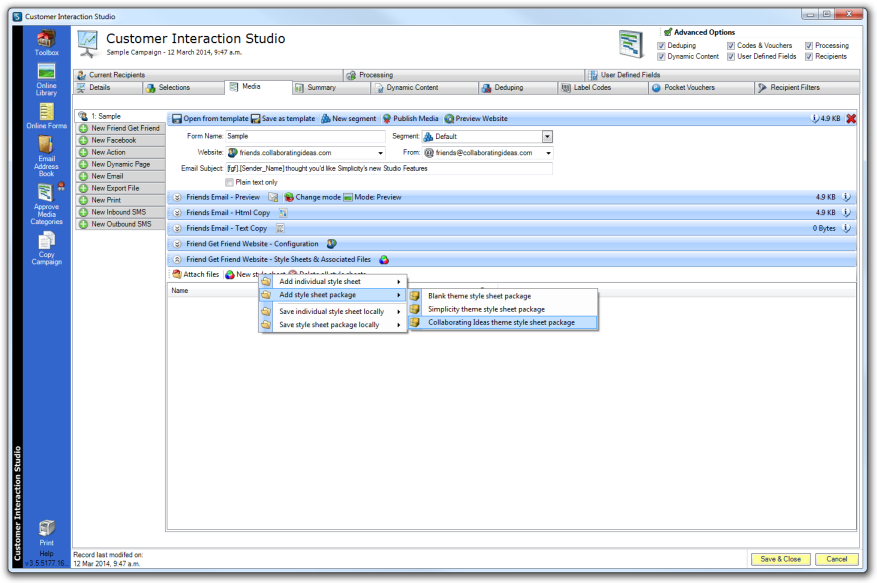
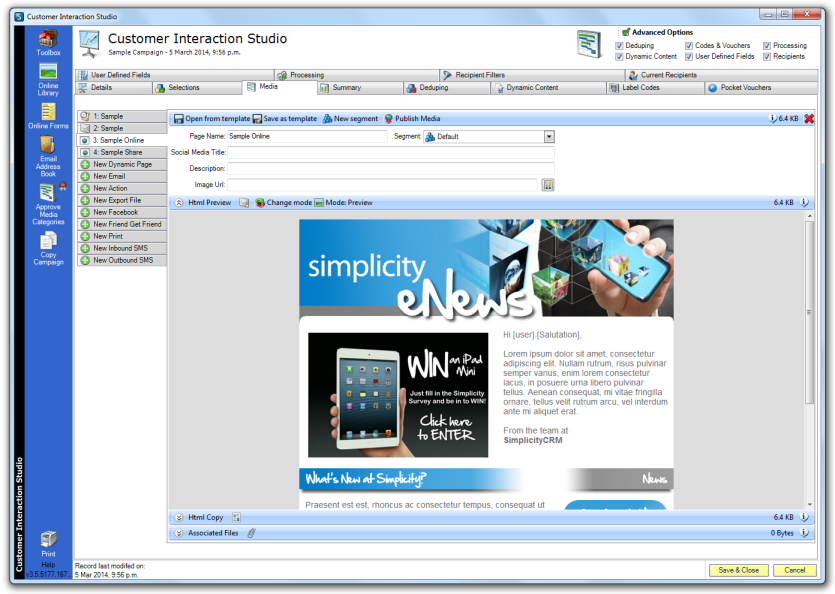
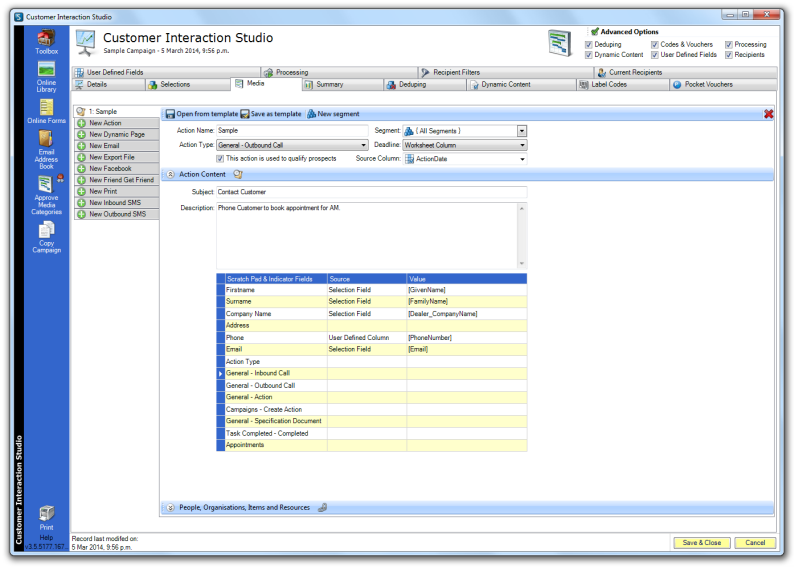
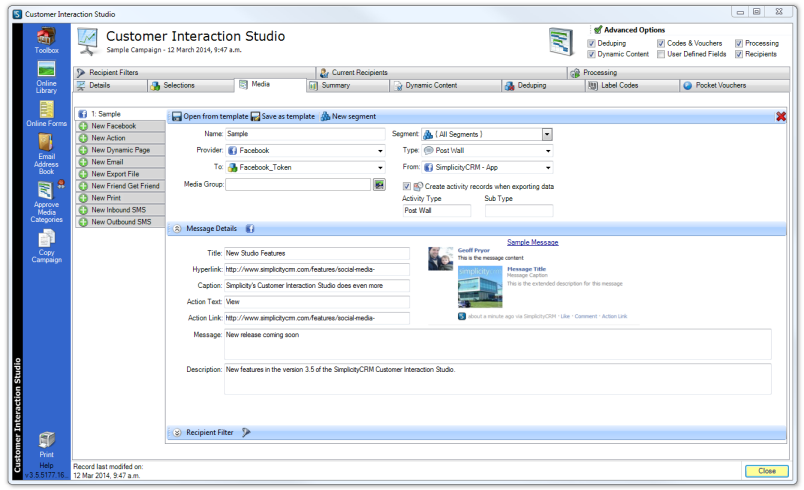
Media Tab
New Email
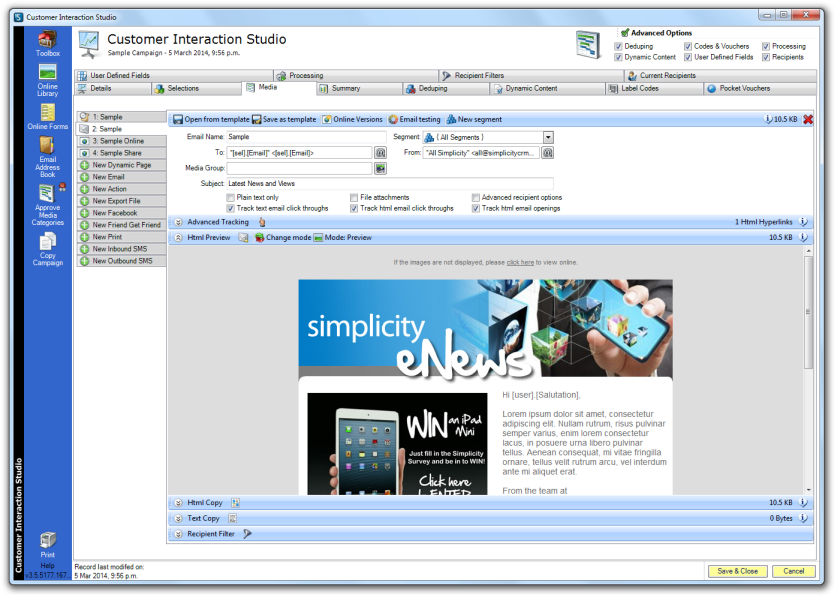
Click on "Online Versions" in the email tab to create the dynamic pages (view online version and share version) of the email.
New Dynamic Page
New Action
New Export File

New Facebook
New Friend Get Friend